Learning how to connect computer parts is easier than it looks. Every cable only fits one kind of port, and most ports are labelled or color-coded. This guide shows how to connect computer parts for both jobs people usually mean: plugging in a desktop computer (monitor, keyboard, mouse, speakers, internet and power) and connecting the parts inside a desktop tower. It also explains the most common mistake that leaves people staring at a black screen, and what to do when something doesn’t work.
What you need before you start
- The computer tower (the box that holds the computer itself)
- A monitor and its video cable (usually HDMI or DisplayPort)
- A keyboard and mouse (USB or wireless)
- Speakers or headphones, if you use them
- An Ethernet cable, if you won’t use Wi-Fi
- The power cables for the tower and the monitor
- A surge protector (strongly recommended)
Put the tower where it has a few inches of space around it for air to flow. Turn everything off before you plug anything in.
How to connect computer parts on the outside: 7 easy steps
Step 1: Find the ports on the back of the tower
Knowing your ports is the first step in learning how to connect computer parts. Most connections go on the back of the tower. You’ll usually see USB ports (rectangular), audio jacks (small round holes, often colored), an Ethernet port (it looks like a wide phone jack) and one or more video ports.
Take a minute to look before plugging anything in. If you’re not sure what a port is, the manual or the manufacturer’s website will have a picture of the back panel. HP’s guide to desktop ports and connections is a helpful reference.
Step 2: Connect the monitor
The monitor needs a video cable. The most common types are:
- HDMI: thin and flat, the same plug used on TVs
- DisplayPort: similar to HDMI but with one corner cut off
- DVI and VGA: larger, older plugs with screws on the sides
Use a port that both the monitor and the computer have. If they don’t share one, an adapter (for example DisplayPort to HDMI) solves it.
The most common mistake: if your computer has a separate graphics card, plug the monitor into the ports on the graphics card, not the ones higher up on the back of the tower. The graphics card ports are usually lower down, in a horizontal row. Plugging into the top (motherboard) ports often gives you a black screen even though the computer is on. If your computer has no separate graphics card, the ports near the top are the right ones.
Step 3: Connect the keyboard and mouse
Most keyboards and mice today use USB. Plug them into any USB port, though the ports on the back are usually more reliable than the front ones. For a wireless keyboard and mouse, plug the small USB receiver into a port and switch the devices on. Bluetooth models pair through your computer’s Bluetooth settings instead.
On older computers you may see two small round ports, one purple (keyboard) and one green (mouse). Plug these in while the computer is off.
Step 4: Connect speakers or headphones
Computers usually have small round audio jacks with a color code:
- Green: speakers or headphones
- Pink: microphone
- Blue: line-in, for connecting other audio devices
USB speakers and headsets simply go into a USB port. If your monitor has built-in speakers, sound can also come through the HDMI or DisplayPort cable.
Step 5: Connect to the internet
For the most stable connection, run an Ethernet cable from the Ethernet port on the tower to a free port on your router. If the computer has Wi-Fi, you can skip the cable and connect to your network after Windows or macOS starts.
Step 6: Connect printers and other devices
Printers, external drives and webcams usually connect by USB. Many printers can also connect over Wi-Fi, which you set up from the printer’s own screen or app. Install the device’s software or drivers if Windows asks for them.
Step 7: Connect the power
Plug the power cables for the tower and the monitor into a surge protector, then plug the surge protector into the wall. A surge protector helps protect your computer from power spikes.
On the back of the tower, check that the power supply switch (a small rocker switch next to the power cable) is set to on, marked “I”.
Turn it on
Now that you know how to connect computer parts on the outside, it’s time to switch on. Turn on the monitor first, then press the power button on the tower. You should see the manufacturer’s logo, then Windows or macOS. The first start-up of a new computer can take several minutes while it finishes setup and installs updates.
Quick guide to cables and ports
| Cable or port | What it connects | How to recognize it |
|---|---|---|
| HDMI | Monitor or TV | Thin, flat plug with angled sides |
| DisplayPort | Monitor | Like HDMI with one corner cut off |
| VGA / DVI | Older monitors | Wide plugs with two screws |
| USB-A | Keyboard, mouse, printer, drives | Flat rectangle, fits one way up |
| USB-C | Newer devices, some monitors | Small oval, fits either way |
| 3.5 mm audio | Speakers, headphones, microphone | Small round jack, often green or pink |
| Ethernet | Router or network | Wide square plug with a clip |
| Power cable | Tower and monitor | Three-prong plug at the wall end |
How to connect computer parts inside a desktop
Knowing how to connect computer parts inside the case helps when you upgrade memory, add a drive or replace a graphics card. If you’re building a computer or replacing a part, the connections inside the tower matter just as much. This is a general overview, not a full build guide. Always follow the manuals for your motherboard and case, because layouts differ between models.
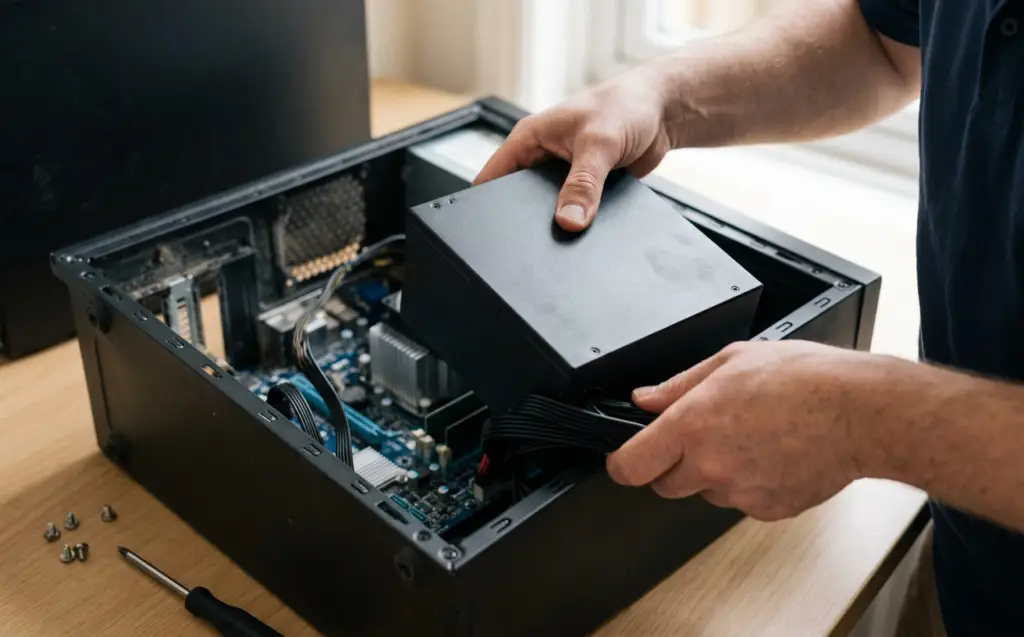
Safety first: switch off the power supply, unplug the power cable, and touch a bare metal part of the case before handling parts, to discharge static electricity. Handle cards and memory by their edges.
The motherboard
The motherboard is the main board everything else connects to. It sits on small raised screws called standoffs, so it never touches the metal case directly. The ports on the back of the motherboard line up with the opening at the back of the case.
The processor (CPU) and cooler
The processor goes into the socket on the motherboard. It only fits one way: line up the small triangle or notch on the chip with the mark on the socket, and never force it. The cooler sits on top with a thin layer of thermal paste, and its fan cable plugs into the header labelled CPU_FAN.
Memory (RAM)
Memory sticks click into the long slots next to the processor. Line up the notch on the stick with the key in the slot, then press down firmly until the clips close. If you have two sticks, the motherboard manual shows which slots to use for the best performance.
Storage drives
Small M.2 drives slot straight into the motherboard and are held by one screw. Larger 2.5-inch and 3.5-inch drives need two cables: a thin SATA data cable to the motherboard and a SATA power cable from the power supply.
The graphics card
A graphics card goes into the long PCIe x16 slot closest to the processor and is screwed to the back of the case. Many cards also need one or more power cables from the power supply, plugged into the top or end of the card.
The power supply
The power supply feeds everything. Its main connections are the large 24-pin cable to the motherboard, the 8-pin (sometimes 4+4-pin) CPU power cable near the top of the motherboard, PCIe power cables for the graphics card, and SATA power cables for drives.
Case buttons and front ports
The power button, reset button, lights and front USB and audio ports connect to small pins on the motherboard. These are the fiddliest part: check the labels on each plug and the motherboard manual, which shows exactly where each one goes.
If something doesn’t work
| Problem | What to check |
|---|---|
| Black screen, but the computer is on | Is the monitor cable in the graphics card ports (Step 2)? Is the monitor on and set to the right input? Is the cable pushed all the way in? |
| Nothing happens when you press power | Is the power supply switch set to “I”? Is the surge protector on? Inside the case, are the 24-pin and CPU power cables fully seated, and is the power button plugged into the right pins? |
| Fans spin but no picture after changing parts | Re-seat the memory and graphics card, and check the graphics card’s power cables. |
| Keyboard or mouse not working | Try a different USB port, preferably on the back. For wireless devices, check the batteries and the receiver. |
| No sound | Are the speakers in the green jack and switched on? Is the right output chosen in the sound settings? |
| No internet | Is the Ethernet cable firmly in both the computer and the router? Is the router online for other devices? |
Tips for a tidy, safe setup
- Leave space behind the tower so cables don’t bend sharply and air can flow.
- Use cable ties or a cable sleeve to keep wires off the floor and away from feet and pets.
- Label both ends of cables you unplug often, such as the monitor and network cables.
- Keep drinks away from the keyboard and the tower.
- Dust the vents every few months so the computer stays cool.
For a beginner-friendly visual walkthrough, GCFGlobal’s free lesson on setting up a computer is also worth a look.
When to call a technician
If you’d rather not work out how to connect computer parts yourself, or you’ve checked every step and the computer still won’t turn on, shows no picture, or keeps restarting, there may be a hardware problem such as a failing power supply, a loose internal part or a faulty graphics card. That’s when it’s worth getting help.
Mobile Computer Repair comes to your home or office across Los Angeles, the San Fernando Valley and Thousand Oaks to set up new computers and fix the ones that won’t start. See our Computer Repair service or contact us, and call 818-704-7588 for a free diagnosis and an honest price.
Frequently asked questions
What is the most important thing to know about how to connect computer parts?
If your computer has a separate graphics card, use the video ports on the card, usually the lower horizontal row on the back. If it doesn’t, use the video port near the top of the back panel.
Can I connect two monitors?
Usually, yes. Most graphics cards have two or more video ports. Connect each monitor to its own port, then arrange them in your display settings.
My monitor only has VGA but my computer only has HDMI. What do I do?
Use an HDMI-to-VGA adapter. Because VGA is an older analog connection, choose an adapter sold for HDMI to VGA, not just a simple plug converter.
Do I really need a surge protector?
It isn’t required, but it’s a cheap way to help protect your computer from power spikes, so we recommend one.
Is it safe to learn how to connect computer parts myself?
Not much. Any USB port works, but the ones on the back of the tower are connected directly and tend to be more reliable than the front ones.